Your garage door won’t open, and you think the spring is broken. Garage door springs are crucial for lifting your door smoothly. This article will guide you through fixing or replacing these important parts.
Don’t let a broken spring disrupt your day. Aaron’s Garage Door Company offers expert services to get your garage door back on track. Contact us today or call 360.609.9393 for immediate assistance.
Key Takeaways
- Torsion and extension are the two main types of garage door springs. Torsion springs last longer and work better for most homes.
- If your garage door is hard to open or makes loud noises, it might need new springs. Checking springs regularly can avoid big problems.
- Always follow safety steps when fixing springs yourself. Use the right tools and wear protective gear to prevent accidents.
- For tough repairs or unsure, get help from a pro. This keeps you safe and makes sure the job is done right.
- Keeping your garage door springs in good shape includes regular oiling and checking tension. This helps them last longer and saves money on fixes.
Understanding Garage Door Springs
Garage door springs play a crucial role in the operation of your garage. Knowing the different types and functions of these springs is essential for proper maintenance and repair. Understanding how these springs work will help you identify any issues that may arise and ensure they are addressed promptly.
Types of Garage Door Springs
Garage doors need strong springs to open and close right. Two main types do this job.
- Torsion Springs: These springs are above the garage door when closed. They use torque to lift and lower the door. Most homes have one or two, based on the door’s weight and size. Torsion springs are known for their efficiency and long life.
- Extension Springs: You’ll find these springs stretching along the horizontal tracks on each side of the door. They extend to open the garage door and contract to close it. Extension springs are more common in older homes. They need safety cables to prevent injuries if they break.
Each type of spring has its role in making garage doors work well. Choosing the right one depends on your garage door’s design and your needs.
Function of Tension Springs
Tension springs in a garage door help balance the weight. This makes it easier to open and close the door by hand or with a garage door opener. These springs stretch and contract to lift most garage doors, whether they roll up in sections or swing up in one piece.
The life of tension springs depends on how often you use your garage door. Most can last for thousands of cycles – one cycle being a single opening and closing of the door. Without these springs, your garage would be very hard to move because of its weight.
Signs You Need a Spring Replacement
Is your garage door difficult to open? Do you hear loud noises when it operates? These are signs that indicate a possible need for spring replacement.
Difficulty Opening the Garage Door
A garage door that’s hard to open can signal a problem with the springs. Garage doors use tension springs for smooth operation. If these springs break or wear out, opening the door becomes difficult.
This issue often means it’s time for a garage door spring replacement.
Regular checks on your garage door can help spot broken springs early, avoiding bigger problems.
Loud Noises During Operation
If you notice loud banging or grinding noises when operating your garage door, it could be a sign of issues with the springs. Torsion springs can make a loud noise if they are worn out or damaged.
These noises usually indicate that the spring is struggling to support the weight of the door, causing strain and potential malfunction.
Ignoring these sounds may lead to further damage and eventually complete failure of the spring system. It’s essential to address these noisy indications promptly by seeking professional assistance from experienced garage door technicians.
Regular maintenance checks can help in identifying and addressing such issues before they escalate into more significant problems, ensuring the smooth operation of your garage door without disruptive sounds.
Visible Wear on Springs
Visible wear on garage door springs is a key indicator that they may need replacement. You can look for signs like gaps, cracks, or corrosion on the springs. This visible wear affects the spring’s ability to function properly and can lead to potential safety hazards.
Regular inspection of these parts is crucial to catch any signs of wear early and prevent further damage.
The visible wear often occurs due to constant tension and pressure from regular use. Typical signs include rust, brittleness, or deformation in the metal components. It’s important to address any visible wear promptly as neglected issues with garage door springs can lead to sudden failure or even accidents during operation.
Safety Precautions for DIY Spring Repair
Stay safe by using the necessary tools and following safety measures before starting. Ensure you have the required equipment and take necessary precautions to prevent accidents.
Tools Required
To replace garage door springs, you will need the following tools:
- Winding bars: These are necessary for winding and unwinding the tension on the springs safely.
- Safety goggles: Protect your eyes during the repair process from any potential flying debris or metal shards.
- Gloves: A good pair of gloves can help protect your hands and provide a better grip when handling the springs.
- Adjustable wrench: This tool is essential for adjusting tension and securing bolts during the spring replacement.
- C-clamps: Use these to hold the door in place securely while working on the springs.
- Stepladder: Allows safe access to reach and work on the garage door components at a height.
Make sure you have these tools available before starting any repairs on your garage door springs.
Safety Measures Before Starting
Before starting the repair, make sure to take safety precautions seriously to avoid any accidents. Here’s what you need to do:
- Wear safety goggles and gloves to safeguard your eyes and hands from any potential hazards.
- Disconnect the garage door opener and lock the door in place to prevent it from moving unexpectedly.
- Use winding bars specifically designed for safely winding and unwinding torsion springs.
- Keep bystanders away from the area to prevent any injuries during the repair process.
- Understand the potential risks involved in working with garage door springs and proceed with caution at all times.
Keep in mind, that adhering to these safety measures is crucial before beginning any DIY garage door spring repair.
Step-by-Step Guide to Replacing Garage Door Springs
Replacing garage door springs can be a challenging task. First, measure the old springs to ensure you get the right replacement. Then, carefully secure the door and unwind the old springs before detaching and installing new ones.
Measure the Old Springs
- Use a tape measure to determine the length of the spring from end to end.
- Record the measurement accurately, including any visible markings or labels on the spring for identification.
- Measure the diameter of the spring using a caliper or ruler, recording this measurement as well.
- Take note of the wire size by using a wire gauge tool or referencing manufacturer specifications if available.
- Verify the wind direction of the spring – whether it is left-hand wound or right-hand wound, as this will be crucial when installing a new spring.
- Inspect and record any visible signs of wear or damage on the old springs, such as rust, elongation, or deformation, to inform your decision for replacement.
These measurements and observations will help ensure that you acquire the correct replacement garage door springs for your specific door system.
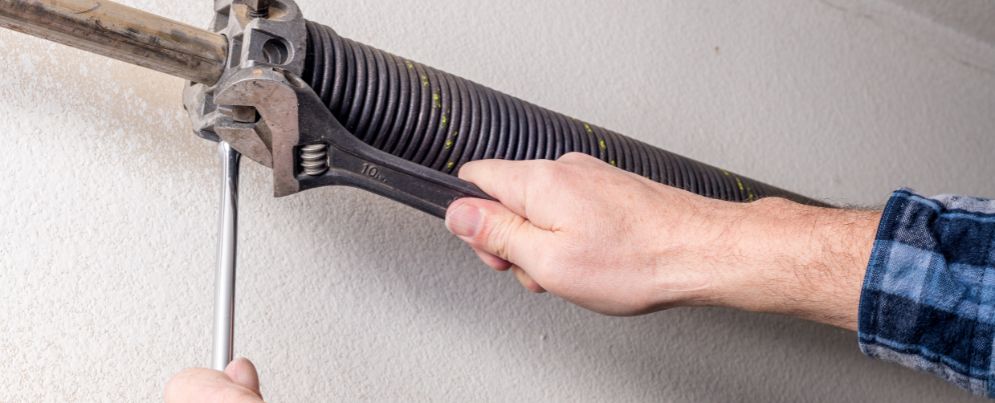
Secure the Door and Unwind Old Springs
To secure the door and unwind old springs, follow these steps:
- Ensure the door is closed and clamped securely to prevent movement during spring unwinding.
- Using locking pliers, clamp onto the torsion tube to prevent it from turning while releasing tension on the old springs.
- Unwind the old springs using a winding bar by inserting it into one of the holes on the winding cone and slowly loosening the tension by turning the bar.
- Continue unwinding until there is no more tension in the spring, then carefully remove it from the torsion tube.
- Repeat this process for any additional springs, ensuring each one is completely unwound before removal.
These steps are essential for safely securing and removing old garage door springs prior to replacement.
Detach and Remove the Broken Spring
When removing the broken spring, take the following steps:
- Disconnect the Garage Door Opener: Unplug the garage door opener to prevent accidental activation while working on the springs.
- Secure the Door in the Open Position: Use locking pliers or a C-clamp to secure the door open and ensure it doesn’t move during spring removal.
- Loosen Set Screws: Use a winding bar to loosen and remove the set screws on the springs, then cautiously release tension from the old spring.
- Remove the Broken Spring: Once all tension is released, carefully detach and remove the broken spring from its brackets.
- Inspect Brackets and Hardware: While removing the broken spring, inspect brackets and other hardware for signs of wear or damage that may need attention during installation of a new spring.
Install the New Spring
To install a new garage door spring, follow these steps:
- Measure the length and inside diameter of the old spring to ensure you purchase the correct replacement.
- Use winding bars to unwind the tension in the old springs safely.
- Detach and remove the broken spring from its position in the garage door mechanism.
- Install the new spring by securing it in place according to the manufacturer’s instructions.
- Wind and secure the new springs using the appropriate tools, ensuring proper tension for smooth operation.
These steps should be followed precisely to ensure safe and effective installation of your new garage door spring.
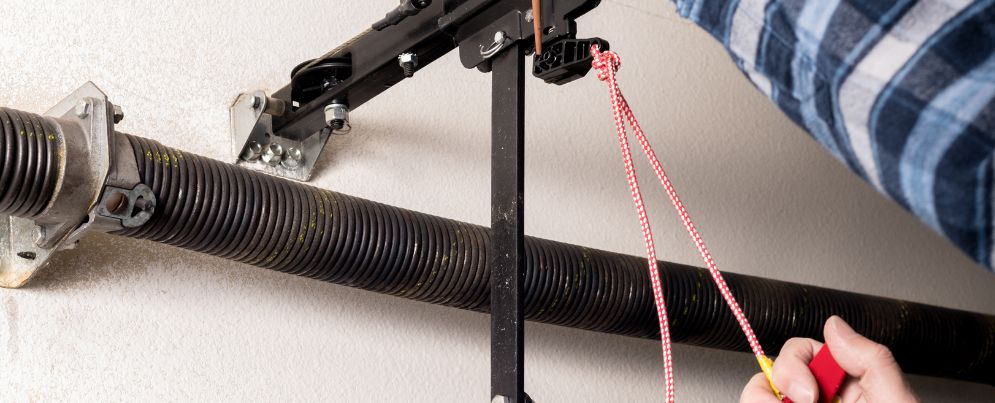
Wind and Secure the New Springs
Before commencing the process, ensure you have the correct size and type of springs for your garage door.
Here’s a step-by-step guide to winding and securing the new springs:
- Positioning: Ensure that the new spring is positioned accurately and securely on the torsion tube.
- Tightening: Use a winding bar to tighten the spring by turning it in the direction indicated by the manufacturer until it reaches the appropriate tension.
- Securing: Once properly tensioned, secure the spring to prevent it from unwinding. This can be done using set screws or other securing mechanisms recommended by your specific garage door model.
- Balance: Test the balance of the door by lifting it manually. If it stays in place when partially open, you have successfully wound and secured the new springs.
Keep in mind, if you encounter any difficulties or feel uncertain about this task, it’s always wise to seek professional assistance for safety reasons.
Dealing with Common Issues
When handling rusted parts during the replacement process, use appropriate lubricants and rust removal methods. After installing the new springs, make sure to adjust the tension carefully for smooth operation without compromising safety.
Handling Rusted Parts
When dealing with rusted parts on your garage door springs, it’s important to prioritize safety and take necessary precautions. Start by using a wire brush to remove the rust and then applying a lubricant specifically designed for metal parts.
It’s crucial to wear gloves and eye protection during this process to avoid any injuries. Regular maintenance can help prevent rust formation, so it’s recommended to periodically inspect the springs for signs of corrosion.
By addressing rusted parts promptly, you can ensure the longevity and proper functioning of your garage door springs.
Adjusting Tension After Installation
After installing new garage door springs, it’s essential to adjust the tension properly. An improperly tensioned spring can lead to door misalignment and even cause damage to the opener or other parts of the system.
To do this, use a winding bar to turn the adjusting cone on the spring. Turn it in small increments until you reach the desired tension level, which is usually specified by the manufacturer or a professional installer.
Too much tension can be dangerous, so it’s crucial to follow guidelines carefully. Once adjusted, test your garage door several times to ensure smooth and balanced operation.
Adjusting Tension After Installation ensures that your garage door functions correctly and reduces wear on other components.
Maintenance Tips to Extend Spring Life
To extend the life of your garage door springs, regularly lubricate them and perform periodic tension checks. These simple maintenance tasks can help prevent premature wear and ensure smooth operation.
Regular Lubrication
Regular lubrication is crucial for maintaining the functionality and longevity of garage door springs, especially torsion springs. Applying lubricant to the springs every six months helps reduce friction and wear.
This simple maintenance task can prevent costly repairs. Use a silicone-based lubricant on the springs to ensure smooth operation and prevent rusting.
Without regular lubrication, garage door springs are prone to premature wear and failure. The average cost of spring replacement ranges from $150 to $350, emphasizing the importance of proactive maintenance like regular lubrication in saving money in the long run.
Periodic tension checks should also be incorporated as part of routine garage door spring care to maintain optimal performance.
Lubricating your garage door’s torsion springs twice a year can help extend their lifespan while ensuring smooth functioning, ultimately reducing repair costs – an effort that’s well worth it.
Periodic Tension Checks
Periodic tension checks are crucial to ensure the smooth and safe operation of your garage door. Over time, the springs can lose their tension due to constant use, which can lead to issues like imbalance or difficulty in opening and closing the door.
By conducting regular tension checks, you can identify any decline in spring tension and address it before it turns into a major problem.
To perform periodic tension checks, you should visually inspect the springs for any signs of wear or damage. You can also test the balance of your garage door by disconnecting the opener and manually lifting the door halfway – if it stays put, your springs are likely balanced.
However, if it moves either up or down on its own accord, this could indicate an issue with spring tensions that needs attention from a professional garage door repair service.
Related: How To Install A Garage Door: DIY Step By Step Guide
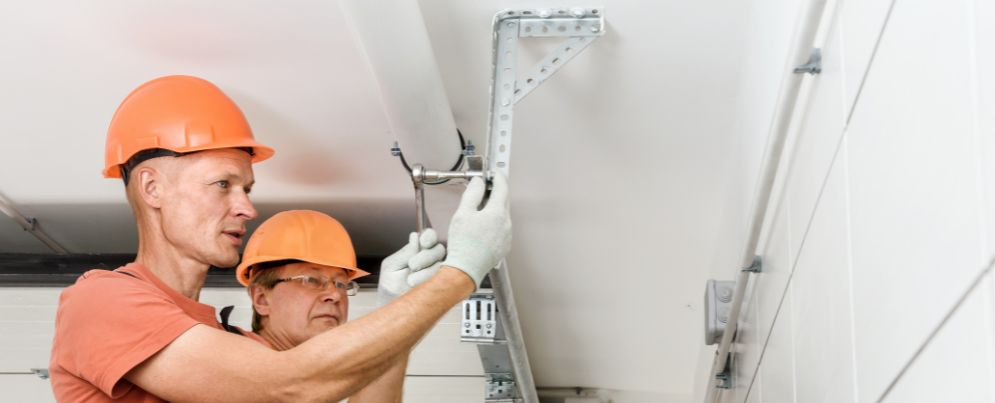
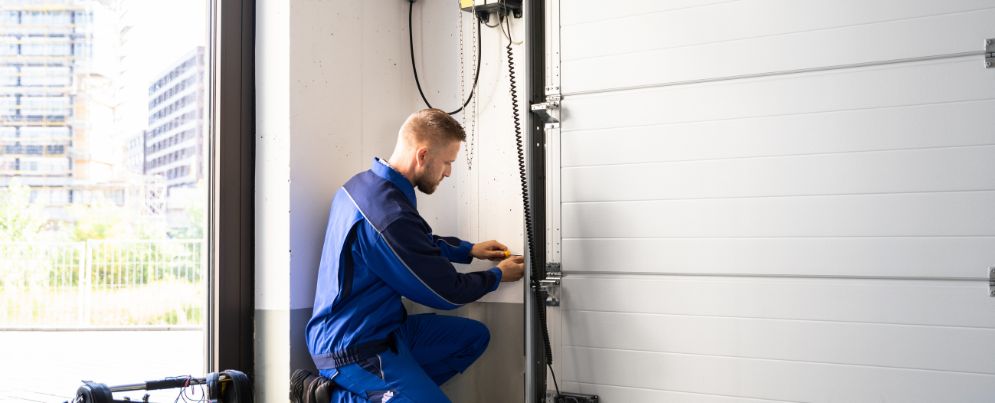
When to Call a Professional
If you encounter complex repairs or have safety concerns, it’s wise to seek professional help for garage door spring repair. Safety is paramount when dealing with the intricacies of garage door springs.
Complex Repairs
Complex garage door spring repairs, such as replacing both torsion springs or dealing with multiple broken parts, require professional expertise. Attempting these repairs without proper knowledge and experience can lead to safety hazards and further damage to the door mechanism.
Professionals have in-depth understanding of the intricacies involved in handling two springs simultaneously, ensuring the correct tension adjustments and alignment. They are equipped with specialized tools and follow industry-standard safety protocols to mitigate risks during intricate repairs.
Additionally, working with garage door openers can add another layer of challenge to the repair process. Professionals possess the necessary skills to diagnose issues related to openers while addressing spring problems effectively.
In situations where detailed repairs are needed due to extensive wear or multiple components failing, seeking assistance from expert garage door installers is essential for ensuring a safe and fully functional system.
Entrusting intricate repairs to professionals not only guarantees optimal results but also ensures long-term performance and reliability of the entire garage door setup.
Safety Concerns
Safety is a top priority in the realm of garage door spring repair. Torsion springs, in particular, are under high tension and require careful handling. Before embarking on any DIY repair, it’s essential to ensure that the proper tools are used and safety measures are in place.
This includes using winding bars tailored specifically for torsion springs and securing the door to prevent sudden movement during repairs. Professional assistance should always be sought for complex repairs or instances where safety concerns arise.
It is advisable to remember that garage door spring accidents can result in serious injuries if not handled with the utmost care. In fact, according to statistics from the U.S. Consumer Product Safety Commission, there were an estimated 23,600 garage door-related injuries reported in 2017 alone.
Therefore, it’s crucial to prioritize safety at every step of the repair process.
Cost Factors of Spring Replacement
The type of spring and any additional repairs needed affect the cost of replacement. These factors can significantly impact the overall expense of repairing garage door springs.
Type of Spring
There are two primary types of garage door springs: torsion springs and extension springs. Torsion springs are usually positioned above the closed garage door, whereas extension springs are located on either side of the tracks.
Torsion springs accumulate energy as they wind up, whereas extension springs expand and contract to supply the required force.
Torsion springs are typically more prevalent for residential garage doors because they offer superior balance and stability during door operation. They also generally have a longer lifespan than extension springs, making them a favored choice for homeowners seeking durability and reliability in their garage door system.
Understanding these distinctions can assist homeowners in making informed decisions regarding spring repair or replacement.
Additional Repairs Needed
If additional repairs are needed, such as fixing the garage door tracks or panels, it can influence the overall cost of the spring replacement. Keep in mind that addressing any other issues with your garage door promptly can prevent further damage and ensure smooth operation of the entire system.
In some cases, when torsion springs break, they may cause other parts of the garage door mechanism to become damaged. This could include cables, brackets, or even the door itself. It’s important to have a professional inspect and address any additional repairs needed to guarantee proper functioning and safety.
Conclusion
In conclusion, understanding garage door spring repair is crucial for maintaining a functional and safe garage door. Being able to identify signs of wear and knowing when to replace the springs can prevent accidents and costly repairs.
While some DIY maintenance is feasible, complex repairs and safety concerns should prompt homeowners to seek professional assistance. Regular maintenance and periodic tension checks can extend the life of garage door springs, providing long-term value and peace of mind.


